FIRST and foremost, go to IRLP.NET/PI ( PURCHASE PiIRLP HERE ) and buy the parts you need based on your skill levels. This supports IRLP as well as makes it easier on you to not have to solder tiny cables. It can be purchased mostly ready to use.
After experimenting with the UV5R I decided to go with an ALINCO 2m on this RPI .
My UV5R+IRLP+RPI is complete. - This is the box I ended up trying.

This is what I came up with... However, I'm likely not going to leave this intact as you see it. Everything is packed in so tightly it's difficult to do anything and there's very little air flow even with the fan. I don't like all the parts this close together plus I get a bit of noise on the TX from somewhere. One of my next options may be to use a standard mobile (alinco) radio instead of the UV5R even though it significantly increases the size of the package due to having the radio mounted either to the outside of the box, or somewhere else in the vehicle. It's back to the drawing board I believe for this enclosure. I have not been able to find a longer case than these morex cases for the intended location of placing this under the seat of my car.
As an update to the above paragraph, the NOISE I referenced was coming from the USB power supply I was using on the PI board. It's the red circuit board to the right of the IRLP board. Very noisy, I removed it, and the noise went away.
The UV5R DOES work in the IRLP mobile application. I'm just not sure it is practical in this case because you still need to mount the radio externally in most cases and it seems to be the case even in this application.
-Pause your curser/mouse over the photos and it will give you a description of what you are seeing-
All connections from the radio and COS out from the radio, are connected to the IRLP DB9 as supplied from Dave Cameron. The unit is shipped from Dave Cameron with the USB sound card, IRLP3 board and the GPIO cable pre-wired between the RPI and IRLP board as well as the audio connection wired direct to the IRLP board. No connections are needed to the Stereo plugs on the USB sound card.
Unfortunately for me, I had to SOLDER this time. Though I was successful in my solder-adventures I Don't know if this was because of sheer luck, or not. If you are NOT good at soldering, don't attempt to solder the tiny chip on this UV5R. I had to use a magnifying glass on it and I don't need glasses yet. It's TINY. The wire I used on the COS is a 26GA from a local electronics store. I also disconnected the speaker wire on the UV5R because it serves no purpose anymore. I used a nice WELLER soldering iron from AMAZON Weller SP40NKUS and hopefully their link stays active. If not, simply search for it. Their included sharp tip was sufficient for this wire size.
")


BASIC item Cost breakdown of this build:
Modified Parallel Cable for PiRLP $30
USB Sound Card (CM119 Based) for PiRLP $30
IRLP Board Modified for 3.3V $110
Raspberry PI $45
Baofeng UV5R $30
Total for these items w/ship fees $265
Testing of the RPI+IRLP3 board and a UV5R ( Yes you should play it in 1080p HD )
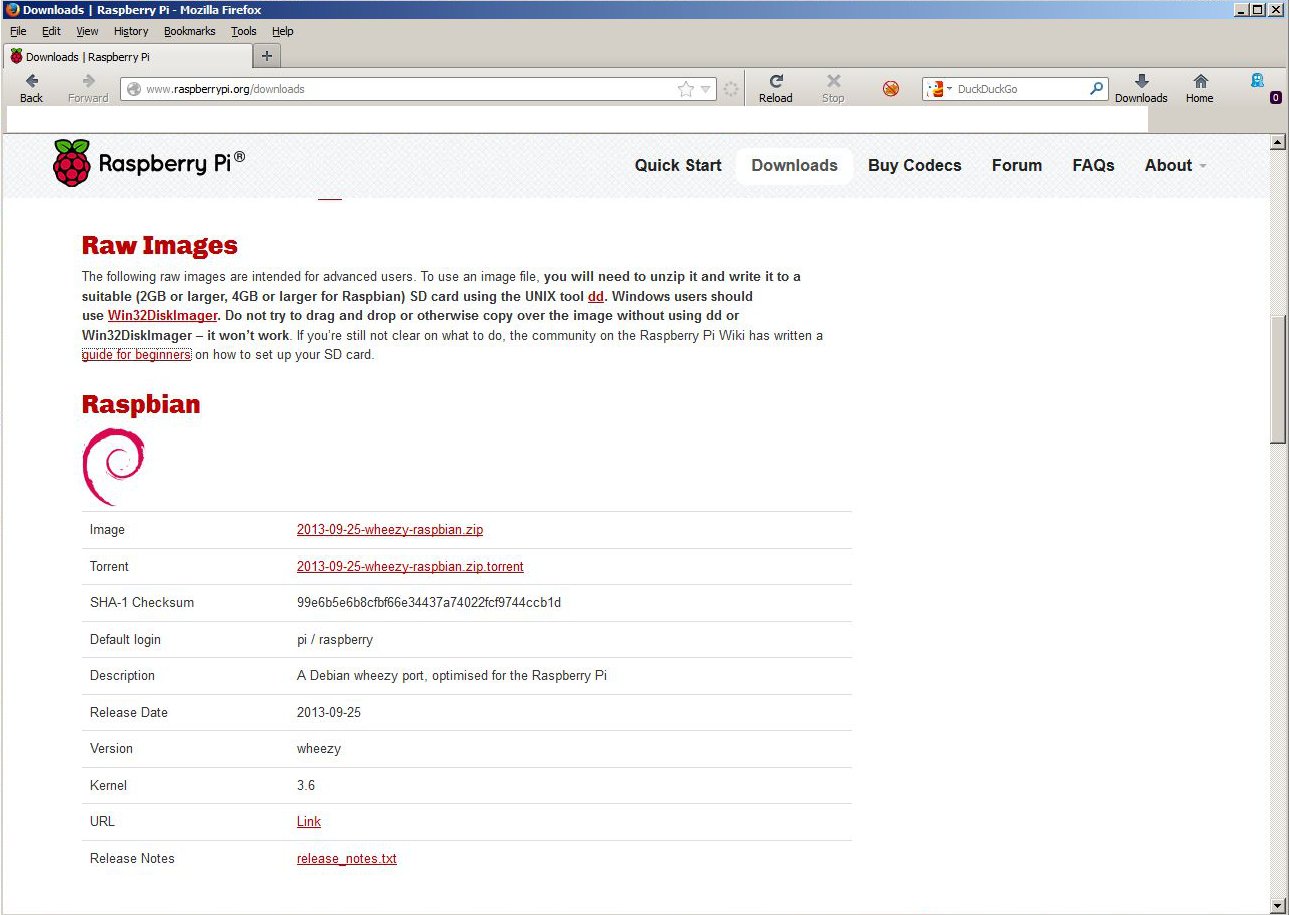
How to prepare your 4+GIG SD card for your raspberry PI IRLP installation. Or, PiRLP. This information assumes you are using WINDOWS.
FIRST.......
SECOND........
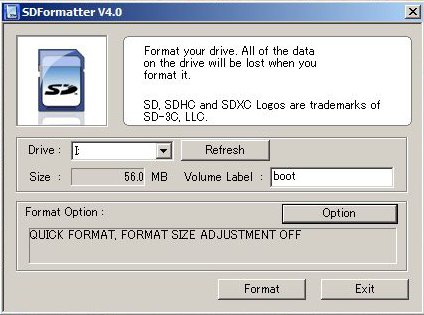
FORMAT your SD card
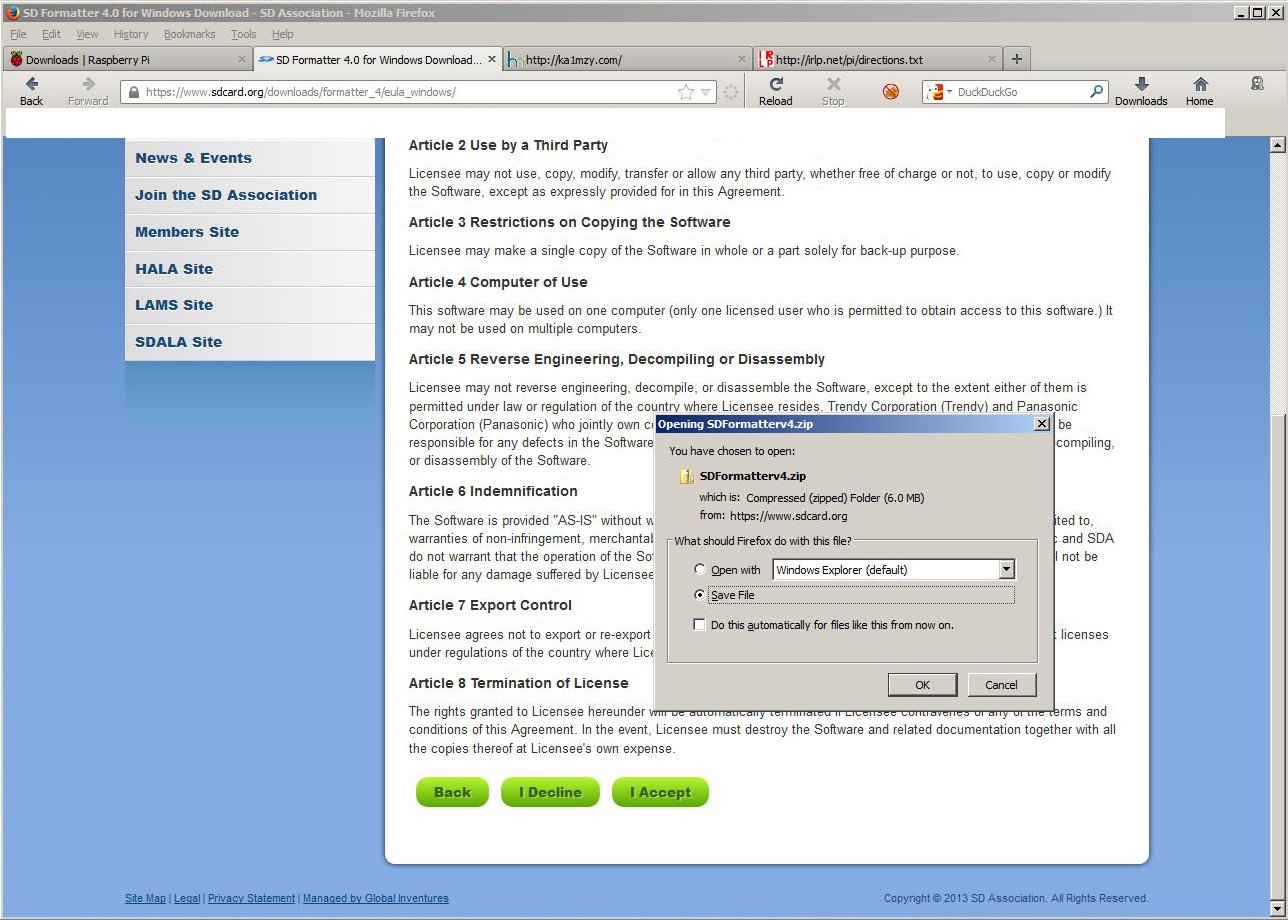
Format your SD card using the SD Card Associations formatting tool.
THIRD...........
.. (burn) your image file to the SD Card
Using Windows 7 or Windows XP
Using the Win32DiskImager program
1. Download the distribution from the raspberrypi.org downloads page or from a mirror or torrent. Make sure the distribution is for the Raspberry Pi, as others will not work. Usually these are zipped (compressed) files ending in .zip or .gz (something like "distribution-name.zip").
2. Extract the image file from the downloaded .zip file, so you now have "distribution-name.img".
3. Insert the SD card into your SD card reader and check what drive letter it was assigned. You can easily see the drive letter (for example G:) by looking in the left column of Windows Explorer. You can use the SD Card slot (if you have one) or a cheap Adapter in a USB slot.
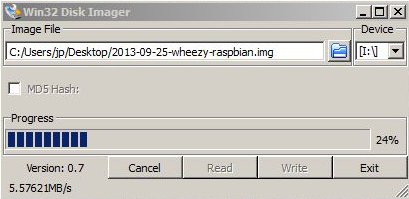
4. Download the Win32DiskImager utility (it is also a zip file). You can run this from a USB drive. Win32DiskImager screen
5. Extract the executable from the zip file and run the Win32DiskImager utility; you may need to run the utility as Administrator! Right-click on the file, and select 'Run as Administrator'
6. Select the image file you extracted above.
7. Select the drive letter of the SD card in the device box. Be careful to select the correct drive; if you get the wrong one you can destroy your data on the computer's hard disk! If you are using an SD Card slot in your computer (if you have one) and can't see the drive in the Win32DiskImager window, try using a cheap Adapter in a USB slot.
8. Click Write and wait for the write to complete.
9. Exit the imager and eject the SD card.
10. You are now ready to plug the card into your Raspberry Pi. See RPi_Hardware_Basic_Setup for the other things you need. /
In Windows, the SD card will appear only to have a fairly small size once written - about 55 to 75 MB. This is because most of the card has a partition that is formatted for the Linux operating system that the Raspberry Pi uses which is not visible in Windows. If you don't see this small directory with files such as kernel.img then the copy may not have worked correctly.
Last steps are from Dave Cameron's website and are copied and pasted here.
SOURCE: IRLP.NET/PI
Boot your Pi, and perform the following steps in the config:
1) expand_rootfs Expand root partition to fill SD card2) change_pass Change password for 'pi' user
3) change_locale Set locale (as required)4) change_timezone Set timezone
5) NEW - Set up the keyboard layout (defaults to UK keyboard)6) memory_split Change memory split (set to 16)
7) ssh Enable ssh server8) boot_behaviour DO NOT BOOT INTO DESKTOP
Then click Finish.
On initial boot, log in using user pi, and the password set above. The pi user is essentially a root user, and we want to create a root password, and carry on. That makes this more like other IRLP nodes...
At the prompt, type:
sudo su -
passwd root (set a password)Now in the future, you can log in as root, or you can also choose to remove the pi user (optional):
userdel -r pi
Now we download the IRLP "get-irlp-files" script, which will carry us through the rest of the install.
wget ftp://ftp.irlp.net/get-irlp-files
chmod +x get-irlp-files
./get-irlp-files
(This process will take several minutes (up to 50), as it basically strips the default install of about 200 unneeded packages, and configures your Pi for the packages it needs for IRLP to run). Lets be honest - the Pi is not the fastest beast on the block.... so this process takes time.
Then progress with your install as usual. All of the commands are the same as a normal node, and the installer automatically picks up the special binary files for the ARM processor.
Your node should work at this point.
The last step we will do is update the firmware on your Pi. This will help keep everyone on a "level" playing field, and will help instructions work for all users.
Follow the directions at: https://github.com/Hexxeh/rpi-update/
EXCEPT, as you are already logged in as root, you can remove the "sudo" in the front of all of the commands. So the command string is:
wget http://goo.gl/1BOfJ -O /usr/bin/rpi-update && sudo chmod +x /usr/bin/rpi-update
rpi-update
Then reboot, and enjoy your new PiRLP node.
If there are questions, please email directly. I will do what I can to help.
Dave Cameron VE7LTD
Links to other PiIRLP Node builds